
3 COMPOSITION TIPS MUST DO TECHNIQUES I USE TO CREATE GREAT LANDSCAPE PAINTINGS
In this post I want to talk about painting composition and 3 things I feel have the greatest visual impact on my paintings. First let’s start with the definition of the term composition and how it relates to visual art: “the placement or arrangement of visual elements or ingredients in a work of art, as distinct from the subject of a work.”
For a still life you can easily imagine how you can place and arrange objects to get the desired composition. For a landscape it may be more difficult for you to imagine, but I will demonstrate 3 easy techniques I use and you can adopt to improve your landscape painting composition.
There is a great DVD tutorial available on Amazon I can thoroughly recommend. “Mastering Composition: Techniques and Principles to Dramatically Improve Your Painting with Ian Roberts”. This DVD is a great resource no matter what your skill level.
I like to immerse myself into the scene, a bit like committing the scene to memory so I can recall it whenever I want to. To help with that I either do quick sketches or take photos, but most often I do both. I will walk around, look from different elevations so as the perspective alters I may undercover hidden gems.
- Take note of focal points and areas of interest to draw a viewer’s eye in;
- What the light is doing, where the sun or a dominate light source is;
- Where shadows get cast.
Then with my scene committed to memory, sketches and photos handy, I am ready to paint and employ my 3 must do painting composition tips.
COMPOSITION TIP 1 – CROPPING
Cropping refers to trimming the edges of an image so it contains only those elements which are crucial to the subject. I use two techniques for cropping.
Viewfinder pairs
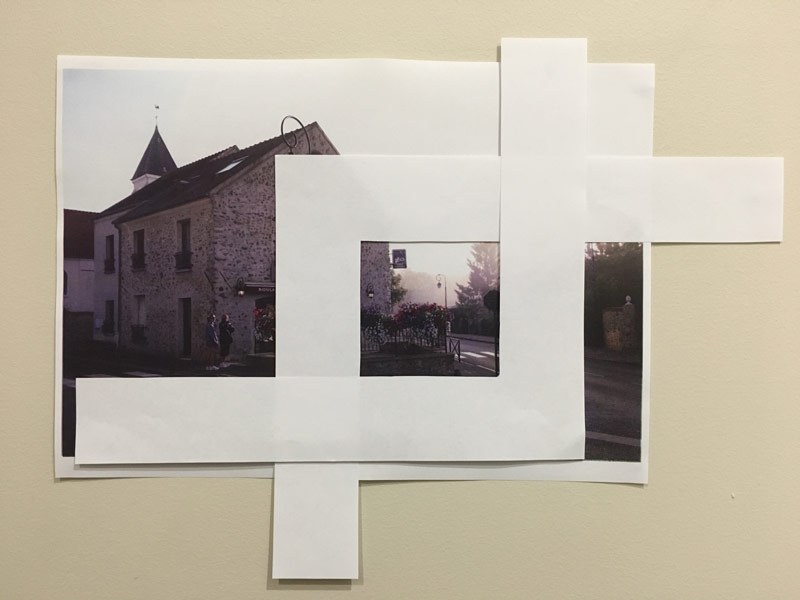
The first approach is low tech using viewfinder pairs, it is extremely quick, and allows me to experiment and test variations easily. Viewfinder pairs are simply two L-shaped pieces of paper or card about 5cm wide. I print out my photo onto a piece of paper, typically no smaller than A4 size. I arrange and overlap the viewfinder pairs to help frame part of the photo I want to crop to make my painting.
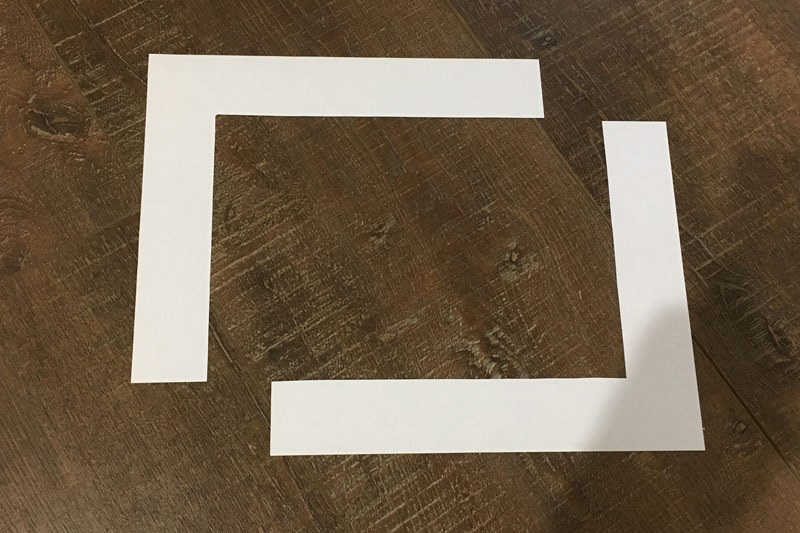
While you can easily make viewfinder pairs yourself they do tend to get beaten up a bit. Derwent Viewfinder is a sturdier professional tool that will not suffer the wear and tear of normal use.
Cropping allows me to drill in and focus on the subject. It removes unwanted visual noise which would otherwise distract the viewer’s attention. Once I have found the area most pleasing, I then commit to that frame and crop it more permanently. That is where my second technique comes in.
Cropping with Image editing software
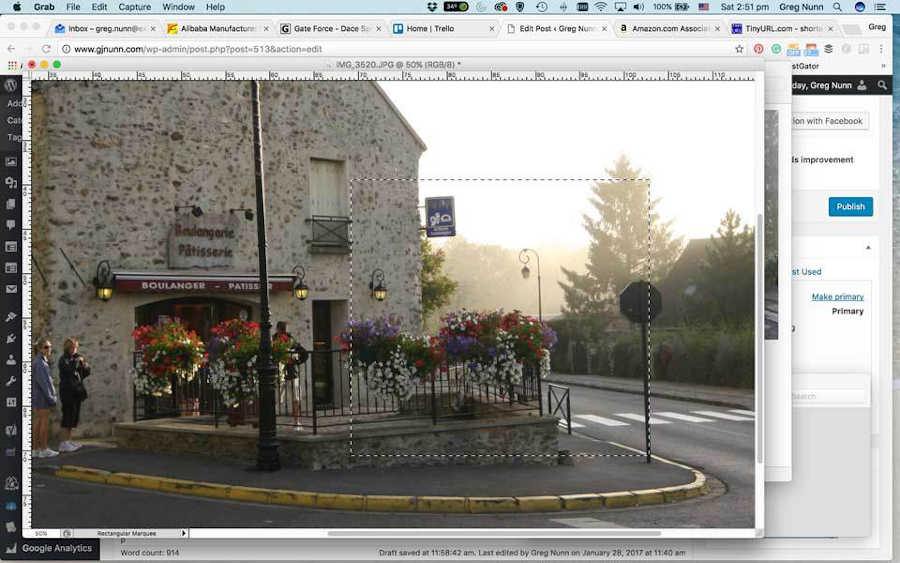
I use Photoshop, but there are an abundance of other software choices out there. All image editing software has the ability to crop an image. In Photoshop place a marquee resembling the framed area with the viewfinder pairs, crop and save the image.

COMPOSITION TIP 2 – REMOVE UNWANTED ELEMENTS
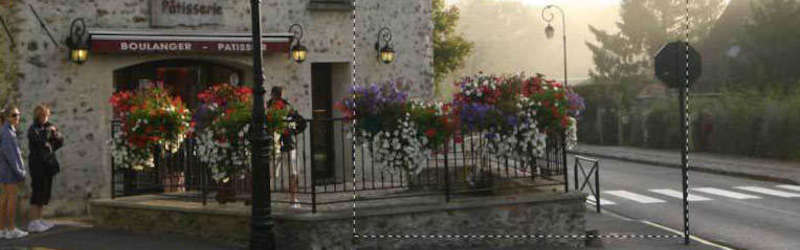
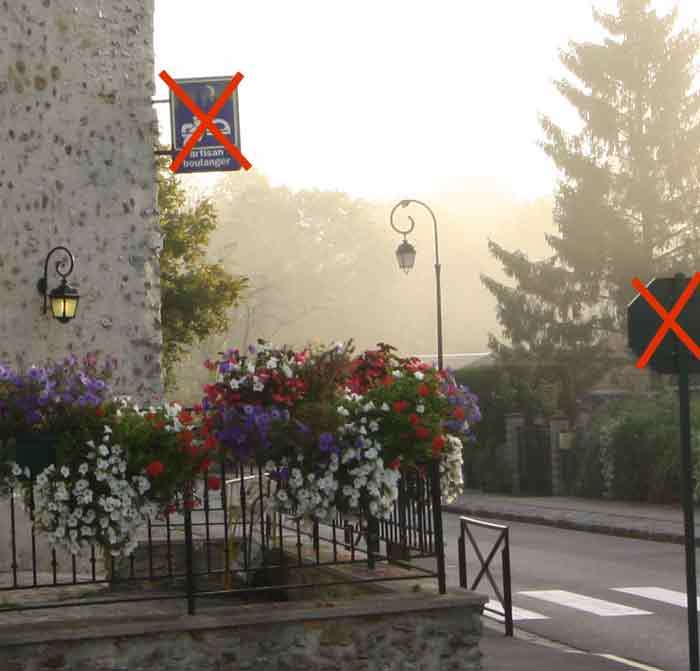
Just like cropping removes unwanted distractions that surround the subject, in this tip I simply removed unwanted elements within scene. I do not alter the image with Photoshop, I simply do this step as I paint by just leaving them out of the painting. You will typically find 1 or 2 elements that pollute your scene. In the example below of my source photo for “Morning mist” you can see I have identified the sign on the wall and the street stop sign as visual noise to be removed from my final painting.
COMPOSITION TIP 3 – THE RULE OF THIRDS
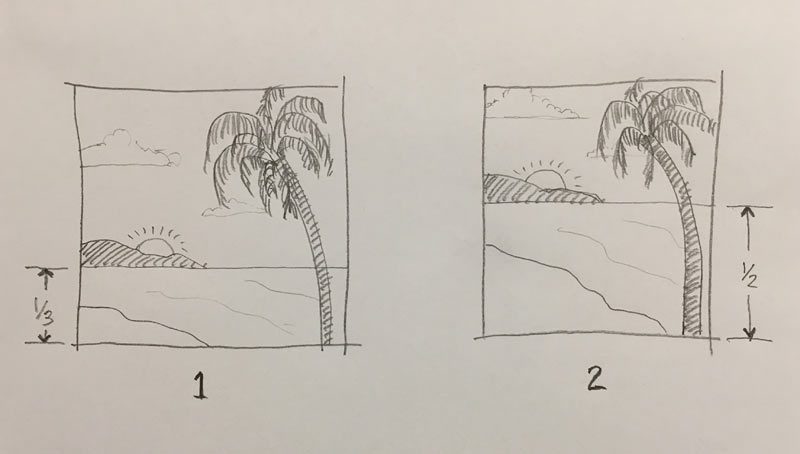
This rule stems from the concept that odd numbers seem natural and are more pleasing to the eye. So I use this rule to break my painting up into segments. For example, I would avoid placing the horizon of a landscape in the centre of my work. Instead situate it higher or lower. It would depend on the scene, but if I wanted to hero the sky and clouds in a painting then I would drop the horizon down to be about a 3rd of the height of the painting. Take these two sketches for example, which one do you find more pleasing?
I adopt the same principle by visually slicing 3 segments vertically into my work. Aim not to place key elements in the centre of vertical planes. It is much better to offset your focal point so it is not in the dead centre of your artwork.
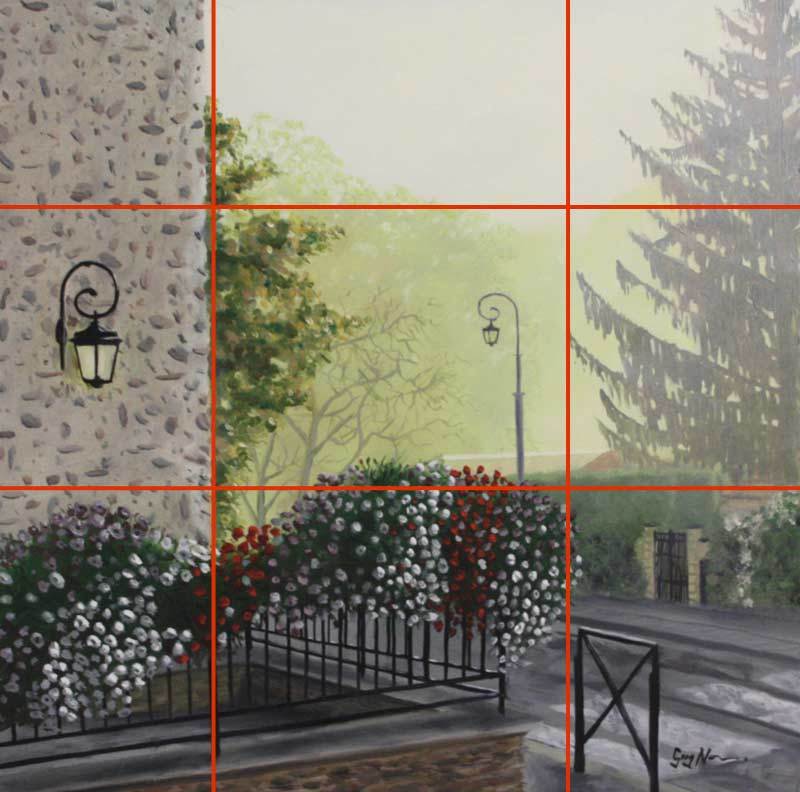
A word of caution, do not physically measure and divide into exact thirds, the result will look forced and unnatural. Just freehand the thirds, near enough is good enough. My painting Morning mist is a good example of how this Rule of thirds can work.
RESOURCES
Here are links to the various resources I mention in above.